
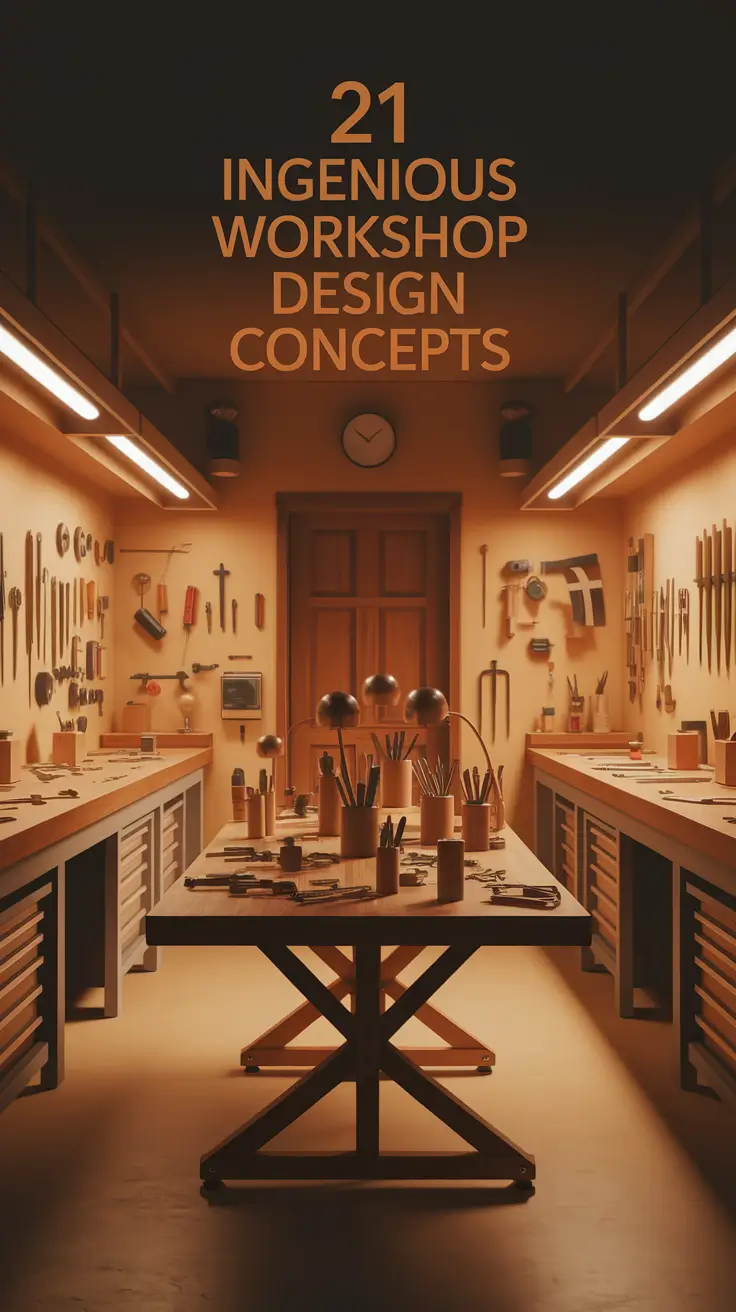
How many times have you entered a workshop and immediately felt challenged or, on the other hand, overwhelmed? Whether you’re working with clay, building furniture, engineering small gadgets, or printing posters, your environment directly influences your creativity and productivity. In this guide, I am going to present a row of clever workshop design ideas that combine functionality with beauty. Whether you are fantasizing about opening a workshop design studio, remodeling your existing place, or just gathering new ideas of a workshop, you will not be left without ideas here.
Workshop design includes everything, smart layouts, eye-catching posters, lighting, layout, workshop storage, and even the selection of a workshop table. You will also get suggestions on how to develop a professional workshop poster, how to arrange a small garage, or how to design your own architecture studio plan. Ready to dive in?
Maximizing Small Workshop Spaces With Smart Layouts
Designing a compact workshop space doesn’t mean sacrificing efficiency or comfort. In fact, I’ve found that smaller areas often inspire more intentional and thoughtful workshop design. With intelligent utilization of every square inch, you can turn it into a space to facilitate light construction as well as precision crafting. Such a method is especially useful to those who work at home or establish a workshop studio in a garage.
My most preferred arrangement saw the inclusion of vertical workshop storage systems, a folding workshop table, and pegboard panels on the walls. Every product was chosen not only because of its functionality but because of modular flexibility. Wall lights, mobile stools and magnetic files can make even the most cramped corners work effectively. Overhead cabinets are ideal in storing the tools which are not frequently used, and the under-bench drawers have all the necessities at a reach.
I highly suggest putting up a sliding barn-style door or an open shelving system so that you do not lose sections of the room. Dwell magazine states, the most effective small space studio is one that does not feel confined regardless of the square footage. Wall-mounted task lamps, in my experience, are excellent sources of specific illumination that does not occupy table space, a necessity on limited layouts.
The thing that this section can be improved with is the focus on the acoustic control. In case your small area is used as a living area, the soundproofing panels or acoustic curtains will make a dramatic difference in the usability and comfort.

Creating a Multi-Purpose Workshop Design Studio
When I began to create a dual-purpose workshop design studio, I was adamant to maintain the balance between creativity and functionality. Whether you’re building standees, shaping clay, or exploring studio architecture plan layouts, flexibility is key. It is necessary to introduce zoning- every part should have its purpose and the whole space should look aesthetically harmonious.
I designed zones for messy tasks (like sanding and painting), digital work (CAD and printing), and collaborative sessions using dry-erase boards and seating. The primary workshop table is in the center, and it is made of oak and has wheels and a laminated surface. The space is prepared to perform any task with adjustable lighting, floating storage cubes, and collapsible easels. Even the flooring—durable epoxy resin—was chosen for easy cleaning.
The thing I like with this arrangement is how it encourages a clear mind. The transition between the tasks is seamless and intuitive, and there is no cross-contamination of projects due to physical separation. According to Architectural Digest, “Designating flexible zones in creative studios enhances productivity while preserving creative flow.”
I could still add additional digital technology to this layout-a wall mounted tablet control center perhaps, or a smart storage inventory that would allow me to keep track of materials.

Workshop Design Ideas That Blend Form and Function
The golden rule in the design of modern workshops is the amalgamation of form and functionality. The Scandinavian interior is one of my favorite sources of inspiration because of the straight lines and functional furnishings combined with warm textures and soft light. Your ideas about your workshop do not have to be either aesthetically or utilitarian, but they can be both.
In one studio, I fitted pine paneling, sparse-industrial shelves, and Edison bulbs hanging. The focal point was a personalized workshop table and it had electrical outlets installed in it and a tool tray. The walls are covered with large framed ideas posters, which are used as decorations as well as references. The space is all united by neutral tones and matte black hardware with subtle sophistication.
To me, a beautiful environment will result in longer and more concentrated working hours. Elle Decor states that workstations that bring about a sense of calm due to aesthetic harmony are a major contributing factor in reducing burnout. I also have a diffuser with citrus oil, believe it or not, smell also plays a role in your working process.
In order to finish this arrangement, I believe I would include soundproofing or background music panels to encourage atmosphere without distractions. Maybe even a voice controlled lighting and tool reminder built-in digital assistant.

How to Design an Eye-Catching Workshop Poster
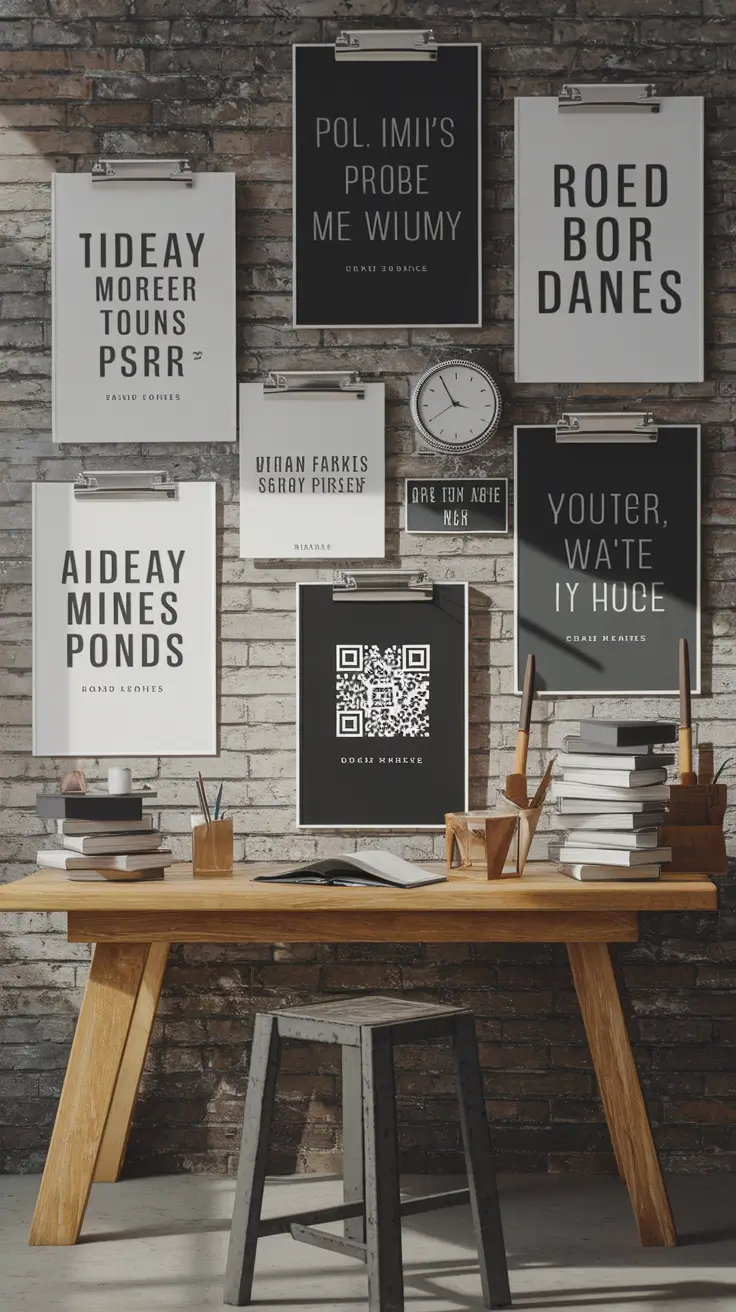
Any workshop should have a strong identity, and that is what a magnificent workshop design poster can do. I have assisted clients in creating beautiful posters that do not only announce the studio architecture plan but also reflect the brand spirit. An attractive design of workshop poster must show the liveliness, color scheme and expertise of workshop.
I prefer a robust typographic structure, clear san serif fonts, and headings, and a well-structured negative space. Include essential details: services, location, hours, and contact. Incorporate background textures (like concrete, woodgrain, or blueprints) to subtly link the visual design to construction or engineering themes. It is relatable since it has illustrations or stylized photos of your workshop table or storage units.
A hint that I have picked up on poster designers in Print Magazine is to only use 2-3 colors to make a statement, and to be sure that your layout is clearly readable at a distance. QR codes have been successful on posters to lead the viewers to my site or portfolio.
What could take this to the next level? A digital version that can be optimized to Instagram and a tactile version that can be printed on textured matte card to give to clients to take away.
Efficient Workshop Storage Solutions for Every Corner
Nothing drags down productivity like disorganized clutter. When I reimagined my studio’s workshop storage, I looked at each corner as an opportunity—not a challenge. My messy space was instantly relieved by custom shelving, retractable hooks and multi-tier drawers.
I fit vertical wall units, under-table slide-ins and ceiling-mounted bicycle-style pulleys to store larger tools. Organization of tools is simplified by clear labeled containers, color-coded bin, and magnetic strips. Seating is also multi-functional, my bench is secretly a storage chest. I have flat files under the primary workbench that hold lightweight material such as posters, art boards, or printing paper.

The biggest thing that has changed in me is time saved in not searching. The Spruce states that efficient storage system may save up to 30 percent of time spent on manual ones. I concur–where everything has its place, then the creativity is more liberated.
If anything, I would add even more mobile carts. Rolling storage is so flexible that it cannot be matched by any other storage method, particularly to big workshops that may be hosting more than one project at a time.

Industrial-Inspired Workshop Design Trends
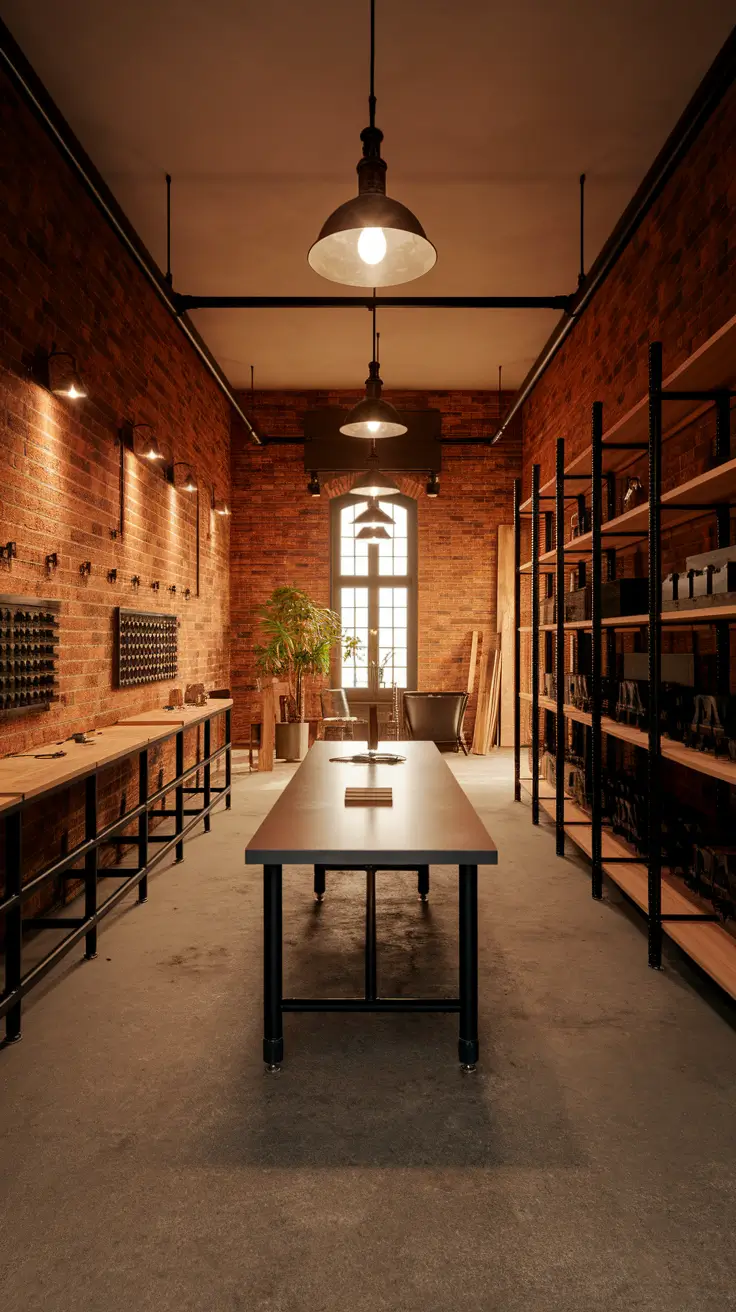
The emergence of industrial chic has changed the perception of workshop aesthetic. I embraced this direction by mixing raw materials, such as exposed brick, concrete flooring, and salvaged metal, with the working modern technology. The result? The rough but fashionable environment that stimulates not only practical work but also meetings with clients.
I incorporated old-fashioned factory light, open-grill shelving and a stainless steel workshop table with a dark-stained oak edge. Tool holders are metal pipe rails and delicate supplies such as clay, paint or electronics are kept in glass-front cabinets. The urban atmosphere is made by minimalist stools, overhead track lights and structural columns.
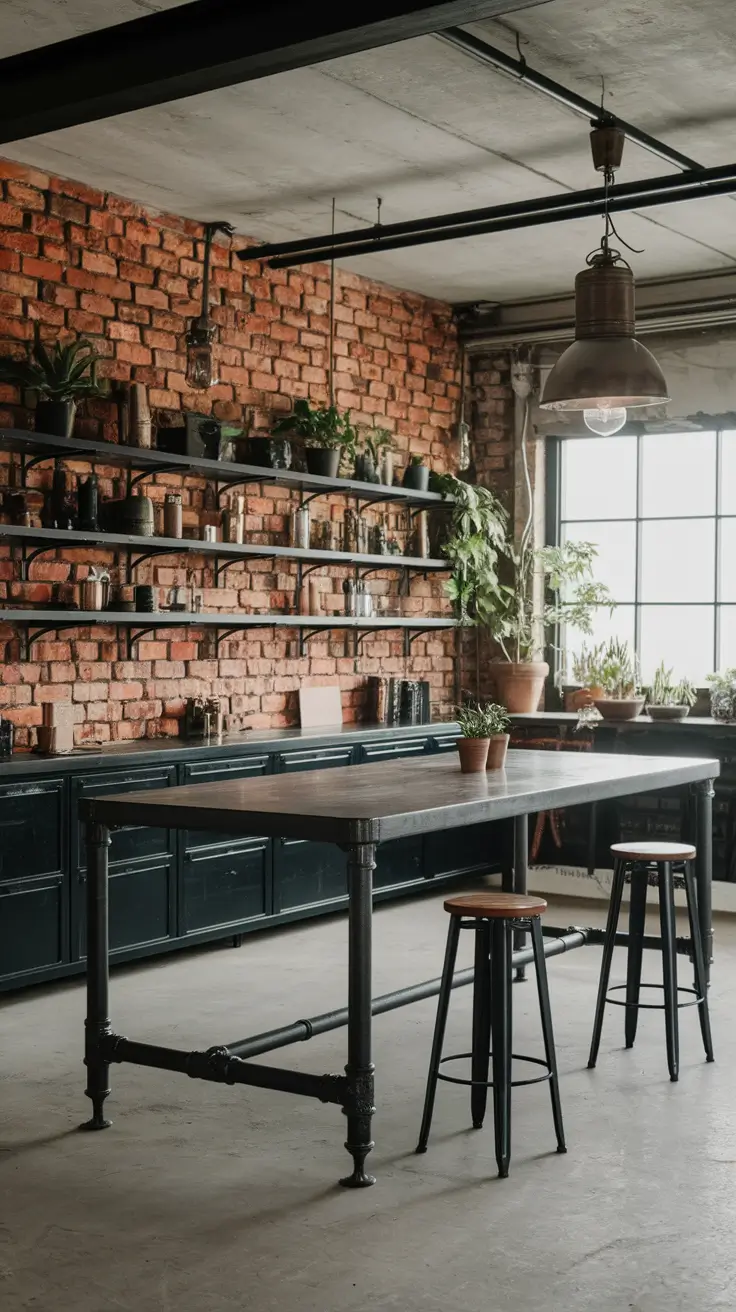
What excites me about this aesthetic is its versatility. Industrial design provides the impression of robustness and genuineness as Dezeen notes, which is ideal to creators and tinkerers. I totally concur with it, it makes even mundane stuff a bit cooler.
I would recommend that some green be added to the space, either hanging plants or a living wall, to break up the hard finishes and add the natural energy of the outdoors into the space.
Fresh Workshop Ideas to Inspire Creativity
I turn to workshop concepts that disrupt the status quo when I need to get creatively refreshed. Consider big color areas, portable furniture, or built-in kitchen nooks to take breaks during the project. An innovative environment should develop along with your requirements, and that is where non-orthodox elements excel.
In my preferred refresh, I had color-themed working places: blue digital editing, yellow paint, and green product assembly. In every zone, there are tools, ideas posters, and mood lightings. The workshop table in the centre is modular and can be used to accommodate both small and big projects. It even has a coffee station and an open shelf of snacks and art books.
Studio McGee taught me one thing: it is quite true that the unexpected is a great way to activate inspiration, such as pendant lights on a tool bench or velvet curtains on shelving. My clients love the casual vibe and surprise details.
The one thing I would think of adding here would be a rotating inspiration board. A magnetic board or cork board on which I can stick moodboards, articles or cuttings that inspire new ideas.

Transforming Your Space Into a Functional Workshop Studio
Converting a spare room, a basement or a garage into a fully equipped workshop studio can transform your productivity and feeling of ownership by leaps and bounds. I have assisted a lot of clients, and redesigned my own room, and it all began with a blank slate and a vision of how the work should flow. It is all about designing inside out, designing the studio around the way you feel you work best, which may or may not involve construction, digital fabrication or printing.
In my case, I began by doing adequate insulation and lighting. I added a central workbench, two wall mounted storage units and an L shaped desk to do digital work. An area close to the window was made into a comfortable sketching area with a soft chair and a task light. I applied warm LED lights, and acoustic ceiling tiles to make the area friendly and quiet. Color-coded drawers make grabbing supplies intuitive.
The only thing that actually changed the way I thought was the acceptance of the concept that this space could be practical and at the same time beautiful. Better Homes & Gardens says, “A studio should be a place of retreat to work and not a trade off space.” I agree. In a smaller house, it is possible to create a well-zoned studio that will inspire even by planning.
I would also like to have a smart scheduling wall panel in the future, which is a digital board that displays deadlines, the amount of supply, and creative to-dos. It’s the one missing piece in my dream layout.

Clever Workshop Organization Hacks You’ll Love
A workshop studio is not just a tidying process, it is a designing of intelligent systems that help to avoid useless movement. I have found out that proper organization of the workshop helps me to remain in the creative flow instead of searching tools. Insignificant modifications such as the introduction of labeled containers or vertical tool racks have produced an enormous effect.
I placed shadow boards to define the location of each object, rolling carts to facilitate transportation, and vertical storage of PVC pipes to store long-handled tools. A wall-hung organizer holds screws, bolts, and tiny components. Adjustable hook pegboards and magnetic bars hold the most used items in reach. The bulkier materials, such as clay and wood blocks, are in open bins below the workshop table.

Personally, the best benefit of good organization is the peace of mind one gets. According to Martha Stewart Living, a well-organized studio creates space in the studio and not the floor to create chaos. I have also adopted a habit of taking a 10-minute reset after every session and this maintains long-term order.
I could also add a barcode label system or RFID tags to the system to keep track of materials digitally, which is particularly useful when dealing with many tools and inventory.

Crafting a Beautiful Yet Practical Workshop Aesthetic
Creating a unified workshop look will assist in establishing the emotional atmosphere in your place. I adore entering my studio and immediately feeling concentrated but relaxed. A grand aesthetic is a combination of individual preference with materials that communicate what you do, whether it is engineering, pastry or printing. This is where mood meets function.
Personally, I created a modern-rustic theme in my studio: raw wood counter tops, brass fixtures, a soft gray cabinets and ambient under-shelf lighting. Personality without clutter is a gallery wall with vintage workshop posters and ideas posters. Plants on high shelves and woven baskets bring softness. The floor is waterproof vinyl of a neutral color to keep things down-keyed.
In my case, I have found that adding your personality to your space actually makes you spend more time in it. According to House Beautiful, Emotional design helps make an emotional durability. I have seen clients spend more time and even challenging work seems lighter in an environment that is thoughtful and considered.
To improve on this, I would want to spend on greener materials and a mini air purifier. The provision of a healthier micro-environment brings long term comfort and aesthetic balance.

Designing a Modern and Bold Workshop Poster
The new workshop poster design must be more than informational, it has to impress and inspire. My style of creating posters is clean and bold with layout balance and using vivid, thematic images. It needs to resemble your main brand identity whether it is presented in your studio or online.
My preferred styles consist of bold sans-serif fonts to be used with headlines, and soft serif or modern monospace to be used with body text. Wide shots of your working table, in-use tools or even your hands working bring in a personal touch. Text overlays on muted backgrounds create contrast. It has real value in such details as QR codes, social links, or your studio architecture plan.
It is like storytelling, through design, to design a great workshop poster. Because, as once Communication Arts put it, a great poster instructs by a glance, inspires by a second look. I couldn’t agree more. The process images and mockups will always attract attention better than the staged perfection.
What I’d improve is perhaps integrating AR (augmented reality) codes—imagine a poster that comes to life with video, adding another layer of engagement to your brand story.

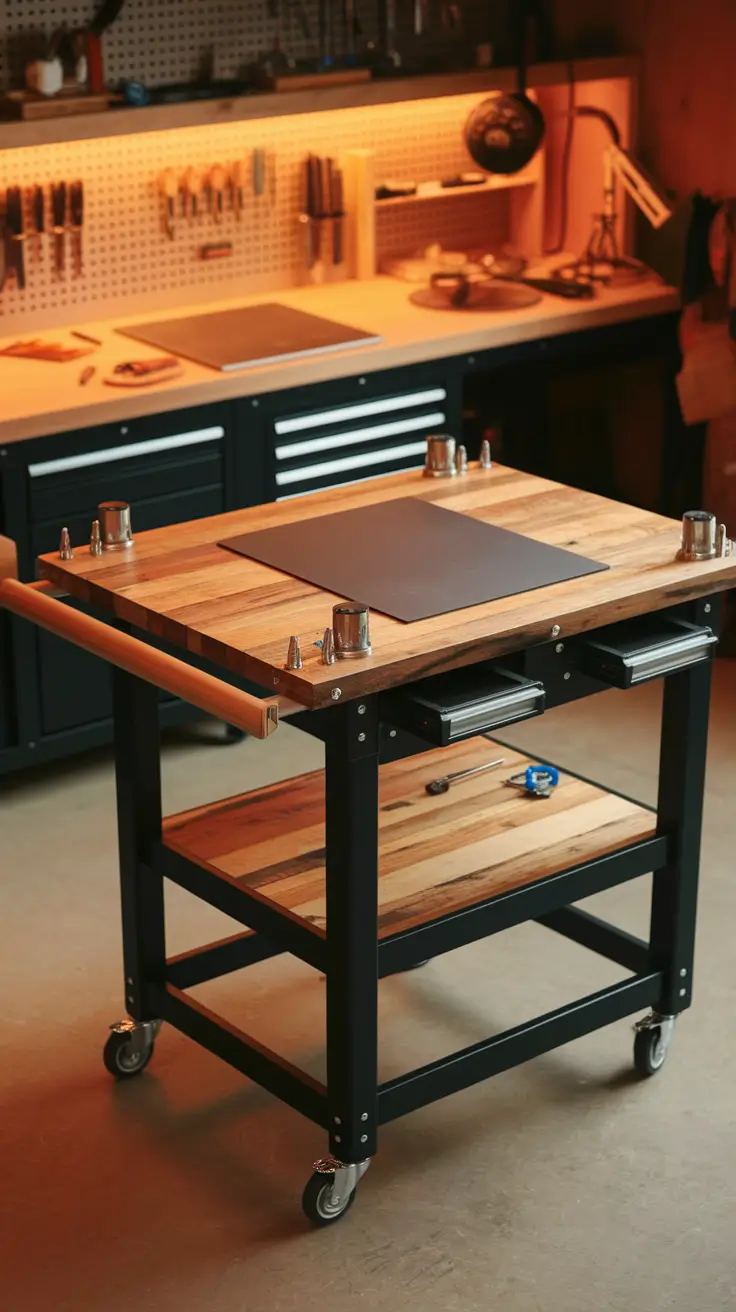
Choosing the Perfect Workshop Table for Your Needs
The workshop table is the heart of your studio—it must serve functionally, support ergonomics, and express your workshop’s tone. When I design a studio I begin with the table and base the rest of the room around it. It is the surface that counts when you are doing kitchen, printing or engineering work.
I selected an adjustable height steel-framed table, a reclaimed oak top and rounded corners. It is fitted with drawers (below) containing bits, a side clamp rail, and an extension cord that is mounted. Casters allow movement between zones. The table also has an extra cutting mat that can be removed and heat-resistant areas to solder or apply glue.

I find that this table by itself has saved me many backaches and layout headaches. According to Fine Woodworking, customization must be your top priority because one size does not fit everyone. The advice has assisted me in investing in modular features instead of using ready-made features.
To make it even higher, I could include LED task lighting that would be incorporated under the edges of the surface or a wing that can be extended in case of larger project requirements.
Using Ideas Posters to Guide Your Creative Process
Visual brainstorming is a powerful tool—and ideas posters serve as your workshop’s vision board. I have discovered that my creativity is maintained when I look at fundamental values and influences on a daily basis. Be it design rules, color swatches or process diagrams, these posters transform your studio into a gallery of thought.
I prefer to print mind maps, process flow, motivational quotes or engineering blue prints as A2 sized posters. These surpass the work area or the sketching nook. I print on soft matte paper with minimum glare, and frame in plain black or oak wood. I even come up with mini spinning posters with magnetic clips to update images frequently.
The best thing about them is their development. As Domino Magazine says, “Dynamic walls reflect dynamic minds.” I have even run client meetings based on these visuals- they really bring the idea out in a much clearer manner than words on its own.
I would like to test digital display boards that would update off my iPad or design software in the future so that it is less of a burden to put an ongoing design cycle directly onto the wall.

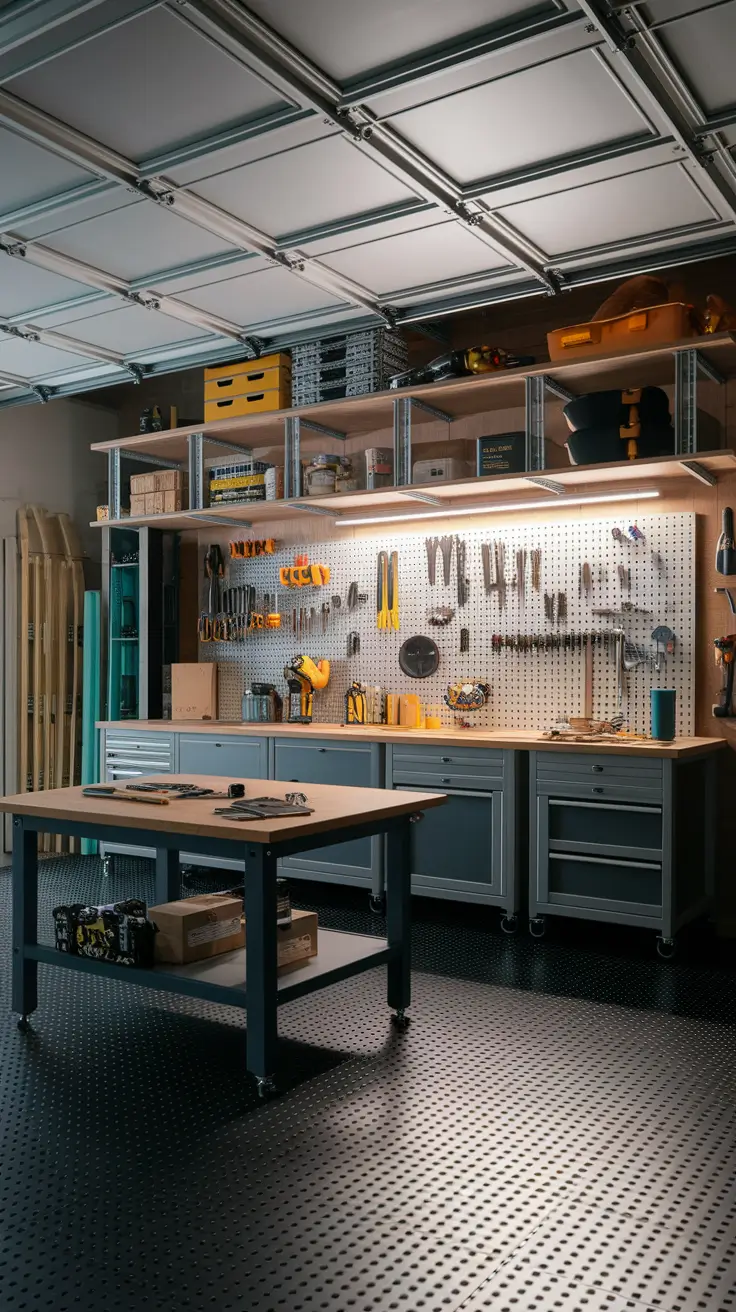
Garage Shop Plans That Maximize Space and Usability
With a proper design, a garage studio would be an equal to any professional workshop design studio. I approached mine as a hybrid between a maker’s lab and a minimalist man cave. Plans of good garage shops focus on ventilation, durability, and divided space. I added insulation to my garage door, LED strip lighting, and zoned the walls to use them specifically.
In my arrangement, I have a fold-out workshop table, vertical storage on the walls, and rubber floors under my feet. A heavy-duty vice and soldering station is on one corner; a high shelf with paint and chemicals on the other. The back wall has a standee of project photos and roll-down tool board. It’s as organized as a kitchen—but made for tools.
The thing that impressed me was how calm and concentrated I was in the garage. According to This Old House, the recommendation is, a garage should be treated as an adaptable frame and not as a fixed purpose. I adopted such an attitude and it assisted me in making conscious, modular choices.
I would still like to incorporate more effective heating or seasonal ventilation, some garages are cold or stale with changes in weather, so that would make it ideal to use all year round.
Construction-Focused Workshop Design Essentials
When I plan a workshop that is devoted to construction, I pay attention to durability, efficiency of working process, and transportation of materials. The area usually requires a tough professional environment thus I prefer exposed steel beams, sealed concrete floors and adjustable shelving mounted on the walls. The smart zoning is essential, the power tools, lumber storage and assembly areas should be separate but close to each other so that every single square meter was used with a purpose.
The room is equipped with heavy duty tool chests, pliers and drills rack on the wall, workbench with built in clamps and a floor to ceiling pegboard. I also incorporate a long workshop table which has in-built power connections to circular saws and grinders. Screws, nails, and measuring tools have been put in labeled bins on cabinets underneath the bench. The overhead LED strip lighting is quite sturdy and makes sure that there is visibility all over, especially in corners.
My personal experience is that reading the Fine Homebuilding Magazine has made me abreast of ergonomic workbench heights and intelligent power tool layouts. Their insistence on the use of rolling storage carts and grounding electricals made my own workshop organization much better.
I would still include a little vertical planning board, close to the entrance, a writing surface that can be erased, where Ideas posters or cut lists can be kept, to help keep teams on track, before each project starts.

Using Architectural Backgrounds to Inform Workshop Layouts
The importance of architecture of a space is one of the many things that people neglect when they design their workshop. I would never fail to tell the clients to examine the background- the ceiling slope of the room, the natural light, and structural details such as columns or HVAC runs. These factors ought to determine the location of workstations, storage, and even windows. The workshop is not an afterthought when you incorporate the current studio architecture plan into the building.
In this room, I would leave tall windows on one side so that light enters and place workbenches at right angles to the windows so that glare is reduced. I prefer alcoves or the structural columns as locations of the vertical workshop storage units or thin pull-out cabinets. A rolling cart is placed under a floating bench and a magnetic wall strip is placed along the central aisle so that tools are easily accessible.
I was taught this technique in a case study by Dwell Magazine, where the architect had vaulted ceilings which enabled him to place the hanging tool racks above the head level- this enabled the ability to have a storage above the head without hindering the movement. This was a brilliantly creative answer that I now seek the same in any new project.
It would help to have a modular lighting concept in this section which is in accordance with the architectural grid- so that the lighting system feels to be the extension of the original design.

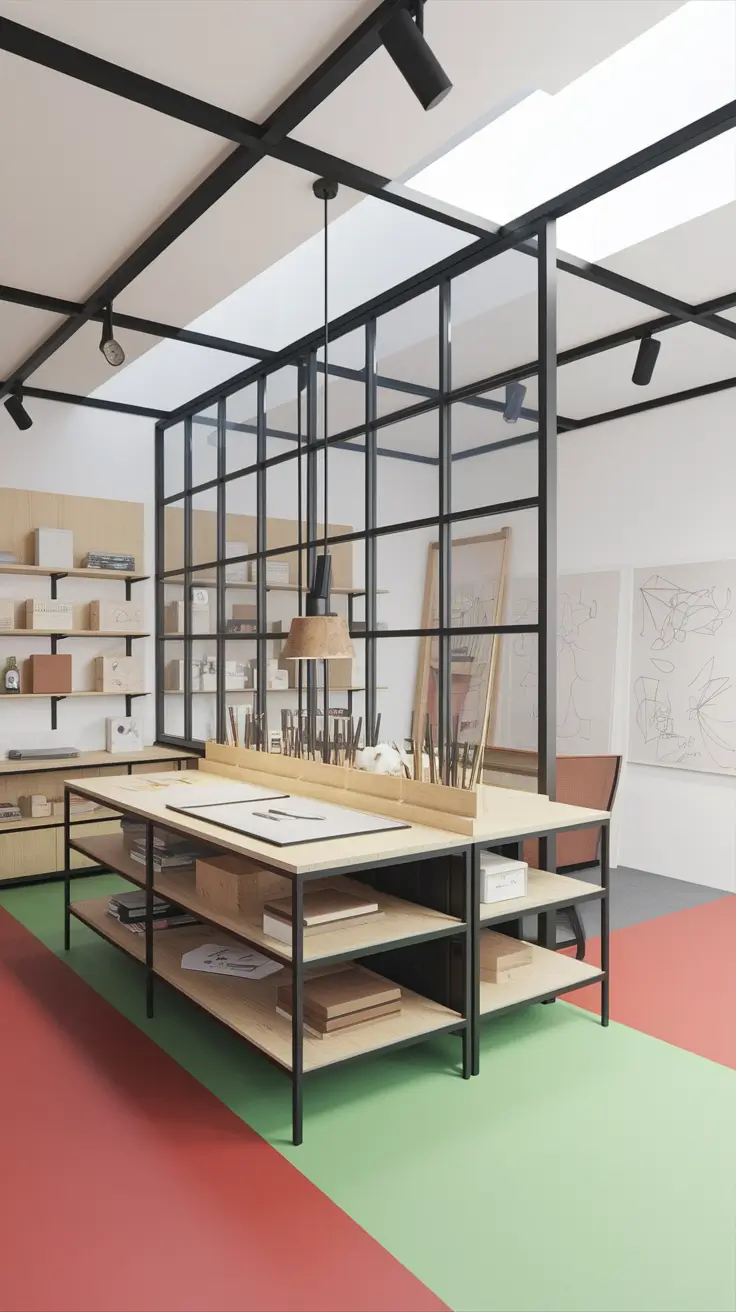
How Studio Architecture Plans Can Streamline Workflow
When I look at a studio architecture plan of a workshop studio of a client, I think about flow, right away. The level of efficiency is in how you circulate within the space, storage to prep to execution areas. The design must minimize the distance between each activity and remove design bottlenecks such as doors which open to work aisles or mislocated supply drawers.
I specify dedicated zones with color-coded flooring or material changes (rubber mats for sanding areas, epoxy floors for wet work). The room is centered by a massive U-shaped table used as a workshop with open shelving beneath it that is easily accessible on all sides. Every wall has a purpose clamp storage, power banks, tool cradles, and a charging dock. A side cabinet contains drafting equipment, sketch books and poster templates of workshop designs.
I have applied this principle to my own work as an inspiration to the work of Architectural Digest and their studio designs and, in particular, their recommendations to allot a function to each wall. I believe that philosophy prevents clutter that has a tendency to creep into center zones, which is essential as far as safety and performance are concerned.
The only thing that I would add here is the incorporation of glass partitions in noisy sections, where people can see each other, but hearing is not affected- this would be perfect in case several members of the team are using the workshop.
Kitchen Workshop Concepts for Culinary Creators
The idea of designing a kitchen workshop is to create a workspace whereby the ingredients, utensils, and equipment work in a clean and accessible environment. In my case it is a U-shaped or galley-style design with a lot of counter area and under-counter workshop storage. Cooking is quicker and more fun since it is often done in higher temperatures and using hygienic materials with intuitive placements.
The standard layout that I prefer is a butcher block counter top, stainless steel drawers and an open shelf pantry wall. The center is equipped with an island-style work table to prepare foods, and hanging rails to hang ladles, spatulas and mesh strainers. On the one hand, I put up vertical racks with spice jars and cutting boards. Above, track lighting, adjustable to each inch, reduces shadow areas when working delicately.

In design terms, I have always liked the test kitchen of Bon Appetit, and their use of drawer dividers to store knives and different temperature zones of storage of ingredients. It is such functional features that make culinary spaces act as real workshop studios.
What’s still missing? I would love to have a smaller smart display to manage recipes and a backsplash that can be written on to take notes during the cooking process like the timing of certain dishes.

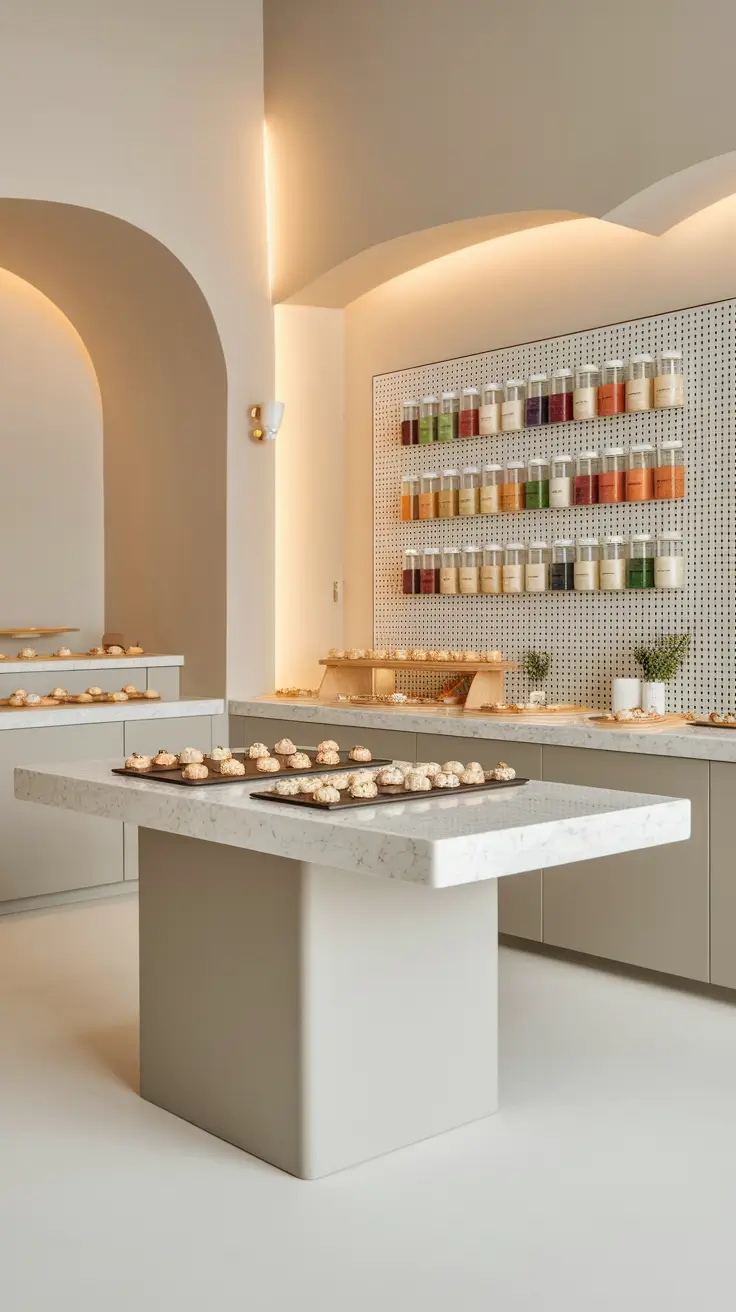
Pastry Workshop Design That Elevates Functionality
The utmost care, cleanliness, and aesthetics are the first priorities in the design of a pastry workshop. My designs have cool colors such as soft greys and whites to communicate a state of cleanliness and calmness which is perfect when paying attention to baking. The plan needs areas of dough mixing, shaping, cooling, and decorative activities. It’s a balance of workflow and artistic focus.
In my arrangement, I have a center-staged quartz-topped workshop table where I do the dough work with lesser drawers that have temperature-sensitive compartments used to store chocolate and butter. On one side is a cooling rack station and on the other side is a decorating nook with an adjustable height. One wall is all pegboard, where pastry bags, whisks and piping tools hang. Overhead task lighting enhances detail work.
During one of the commercial kitchen remodels, I drew inspiration on the article about the baking lab of the New York Times, where a visual ingredient wall came in handy to simplify the prep. The use of labeled transparent jars to present flours, nuts, and toppings made the place beautiful and efficient.
Just to go the extra mile, I would add a roll out cabinet with stand mixers and a floor to ceiling tower that would hold molds, trays and specialty tins as well.
Workshop Design for Home Printing & Screen Printing
Establishing a workshop studio that is printing or screen printing-oriented implies the need to reconcile fragile digital equipment and dirty ink activities. I ensure that I separate the area into a clean area where screens and digital printers are used and wet area where ink is washed and dried. Good ventilation, flat surfaces, and ink-safe floors are non-negotiable.
I put in a waist high bench with a screen dryer drawer built in, wall mounted racks to hold mesh screens, and pull out trays to hold finished prints. On the side wall, I will have a shelf and power strip area devoted to printers and computers. Floating vertical bins help separate paper stock by size. I also hang on the wall framed samples of workshop poster designs as a decor and source of inspiration.
The experts of Print Magazine underline the importance of verticality even in narrow areas, which I have applied in the form of slotted walls to keep the screens without touching one another. This gimmick preserves their integrity, and it also serves as a visual reminder of current projects.
What could be added here? Sensitive ink red-light drying area or a clever humidity sensor to ensure paper is kept flat and optimal drying conditions is maintained.

Organizing a Workshop for Shipping, Mailing & Post Projects
The work of designing a post, mailing or shipping workshop is high volume material handling and repetitive. I want each step to be minimized and clutter to be minimized so that the process is as smooth and automated as possible. My layouts are linear and conveyor-type where the movement is easy to see in and out.
I have long runs of countertop with baskets below sorted by the size of package. There is a rolling workshop table that serves to assemble boxes, and above it, there is a tape dispenser and label printer. On one wall end, there is a cubby mail sorter and wall-mounted poster Ideas that provides shipping guidelines. Everything’s within arm’s reach.
In designing e-commerce clients, I have applied the knowledge in the warehouse design tips by Shopify that suggested that packing materials should be arranged in vertical dispensers to save time and avoid wastage. That principle has helped me double packing efficiency.
Missing element? This workshop would be taken to the next level by having a floor-mounted weight scale station with a digital label system.

Save Pin
