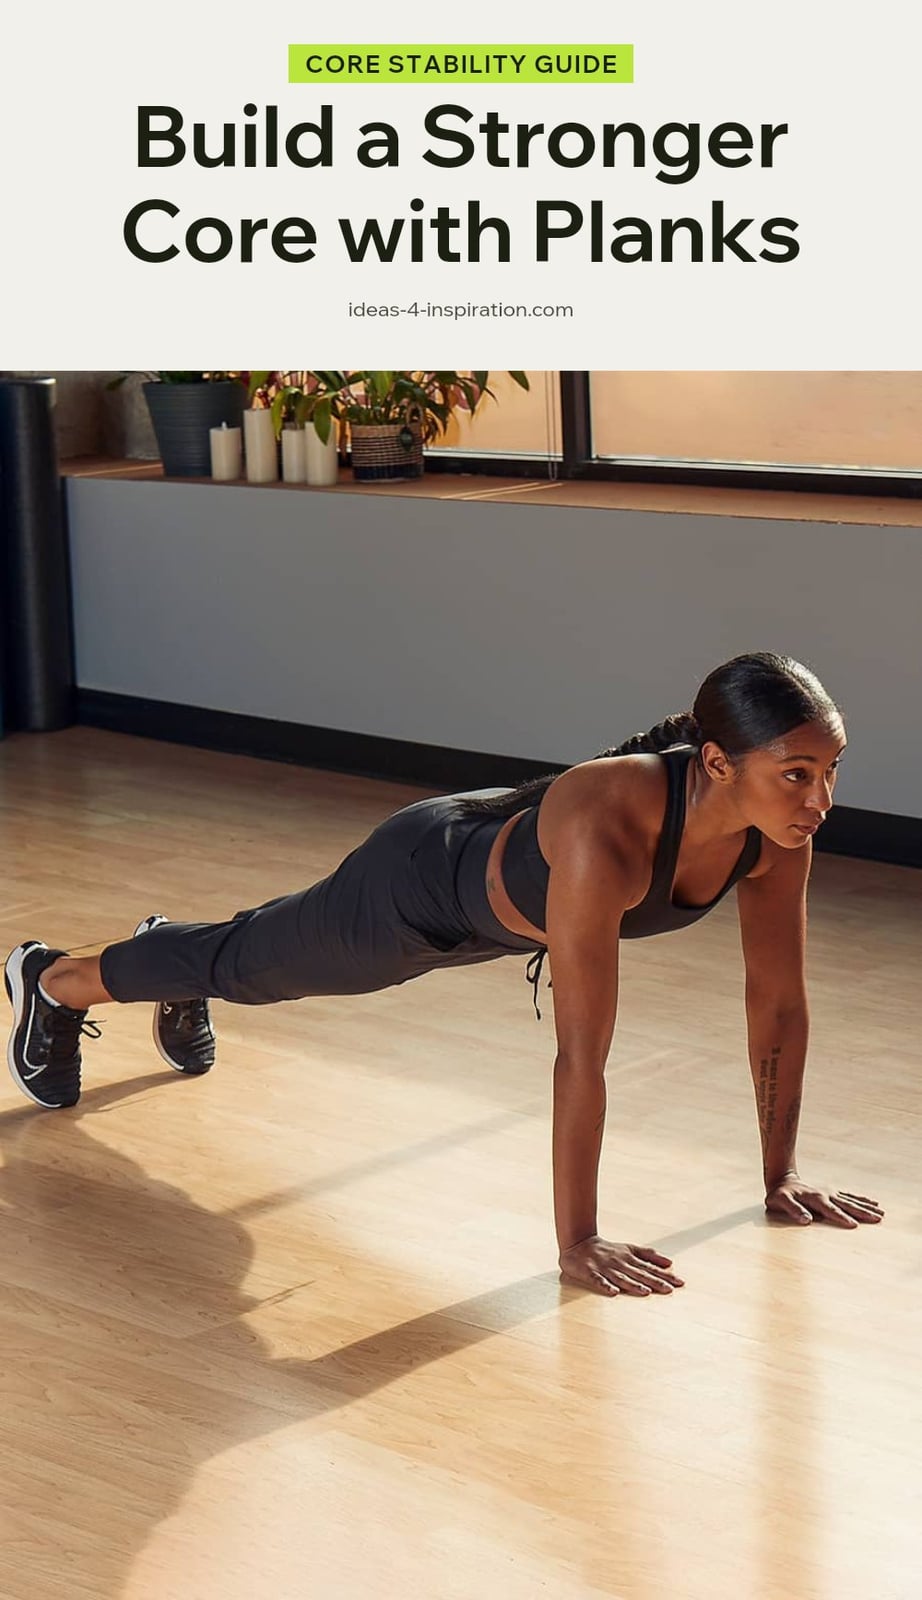
You know that feeling when your back aches after sitting all day, or your balance feels off? A strong core is the foundation for so much, and the plank is one of the most effective, low-impact exercises you can do anywhere. It’s an isometric hold that fires up your entire midsection, plus your shoulders, arms, glutes, and hamstrings.
This guide walks you through the best plank variations, proper form, a weekly schedule, and common mistakes to avoid, so you can build real stability and strength safely.
Key Takeaways
- Planks are isometric, building endurance and stability in your core without movement.
- Keep a straight line from head to heels and pull your navel toward your spine.
- Start with 30-60 second holds; quality beats quantity every time.
- Aim for 3-4 plank workouts per week with rest days in between.
- Stop if you feel sharp pain, especially in your lower back or shoulders.
Why Planks Are Your Core’s Best Friend
Planks are an isometric exercise, meaning your core muscles contract without any movement. This builds endurance and stability in your rectus abdominis, obliques, and transverse abdominis all at once. They also engage your shoulders, arms, glutes, and hamstrings for a full-body challenge. Proper form is everything: maintain a straight line from head to heels and keep your core tight to get the most out of every second.
1. Warm-Up: Cat-Cow Stretch

Start on all fours with your hands directly under your shoulders and knees under your hips. Inhale as you drop your belly and lift your chest and tailbone toward the ceiling for the cow pose. Exhale as you round your spine, tucking your chin and tailbone for the cat pose.
- Sets and reps: 8 to 10 slow repetitions.
- Form cue: Move with your breath, not your speed.
- Make it easier or harder: To deepen the stretch, hold each pose for a full breath cycle.
2. The Classic Forearm Plank

Lower onto your forearms with your elbows directly under your shoulders and your toes on the floor. Keep your body in a straight line from your head to your heels. Pull your navel toward your spine to engage your core and look down to keep your neck neutral. Hold for 30 to 60 seconds.
- Time: 30 to 60 seconds per set.
- Form cue: Squeeze your glutes and quads to help maintain a stable position.
- Make it easier or harder: Drop to your knees for an easier version or lift one leg for a challenge.
3. High Plank (Push-Up Position)

Begin in a push-up position with your hands directly under your shoulders and your fingers spread wide. Keep your body straight from head to heels, engaging your core, glutes, and quads. Avoid letting your hips sag or rise too high. Hold for 30 to 60 seconds.
- Time: 30 to 60 seconds per set.
- Form cue: Push through your heels to activate your leg muscles even more.
- Make it easier or harder: Lower to your knees to reduce intensity or lift one foot off the floor for more difficulty.
4. Side Plank

Lie on your side propped on one forearm, elbow directly under your shoulder. Stack your feet or place one in front of the other for balance, then lift your hips until your body forms a straight line. Squeeze your obliques to hold the hips up, and breathe steadily for the whole hold.
- Time: 20-40 seconds per side.
- Form cue: Push the floor away with your forearm so your shoulder does not sink.
- Make it easier or harder: Bend your bottom knee and rest it on the mat for support, or lift the top arm toward the ceiling to add a balance challenge.
5. Plank with Shoulder Taps
Start in a high plank and tap your right shoulder with your left hand while keeping your hips as still as possible. Put the hand back down, then tap your left shoulder with your right hand. Alternate sides and watch your hips, since any rocking means the core has stopped doing its job.
- Sets and reps: 10-12 taps per side, 2-3 sets.
- Form cue: Spread your feet a little wider than a standard plank so your base is stable.
- Make it easier or harder: Tap your thigh instead of your shoulder to shorten the reach, or slow each tap down to three seconds to make it harder.
6. Plank Jacks
Begin in a high plank with your core tight, then jump your feet out wide like a jumping jack. Jump them straight back together right away, keeping your upper body still and your hips level. Move with control rather than speed, because fast jacks are where the hips start to sag.
- Sets and reps: 10-15 repetitions, 2-3 sets.
- Form cue: Land softly on the balls of your feet and keep your shoulders stacked over your wrists.
- Make it easier or harder: Step one foot out at a time instead of jumping, or pick up the pace slightly once the form holds.
7. Reverse Plank
Sit with your legs extended in front of you and place your hands on the floor slightly behind your hips, fingers pointing forward. Press into your hands and heels to lift your hips toward the ceiling until your body forms a straight line from head to heels. Keep your core engaged and your gaze toward the ceiling or slightly forward.
- Time: 20-40 seconds.
- Form cue: Squeeze your glutes at the top so your hips do not drop below the line.
- Make it easier or harder: Bend your knees with feet flat on the floor for an easier version, or lift one leg for a harder one.
8. Cool-Down: Child’s Pose
From all fours, sit your hips back toward your heels and walk your hands forward, or rest your arms alongside your body. Let your forehead drop to the mat and let your back and hips release. Breathe deeply and hold for 30 to 60 seconds to gently stretch your back and relax your core.
- Time: 30 to 60 seconds, or longer if your lower back feels tight.
- Form cue: Keep your forehead supported and your neck long rather than craning to look forward.
- Make it easier or harder: Slide a folded towel under your forehead for support, or walk your hands slightly to one side to stretch the opposite hip.
My tip: This is a perfect way to end your workout and signal to your body it’s time to relax.
Gear Up: What You’ll Need for Your Plank Workout
Two items cover almost every plank variation on this list.
- Exercise mat: Gives you cushioning for forearms, elbows, and knees, and a non-slip surface so your hands and feet stay put.
- Timer or stopwatch: Tracks your holds and repetitions so you can add a few seconds each week instead of guessing.
A mirror or your phone’s front camera can help you check that your hips aren’t sagging, but it isn’t required.
Your Weekly Plank Challenge Schedule
Consistency is key for building core strength. Aim for 3 to 4 plank workouts per week, and leave at least one rest day between sessions so your muscles can recover.
| Day | Focus | Target |
|---|---|---|
| Monday | Classic forearm plank plus high plank | 2 to 3 sets of 30 to 60 seconds each |
| Wednesday | Side plank and reverse plank | 2 sets of 20 to 30 seconds per side |
| Friday | Shoulder taps and plank jacks | 10 to 12 reps per side, 3 rounds |
| Saturday (optional) | Your weakest variation | 2 to 3 short holds, form first |
Noticeable improvements in core strength and stability typically appear within a few weeks. Gradually increase your hold times or repetitions as you get stronger, adding 5 to 10 seconds or a couple of reps at a time rather than jumping ahead.
Frequently Asked Questions
How long should a beginner hold a plank?
If you’re new to planks, start with a hold that lets you keep perfect form, even if it’s just 10 or 15 seconds. Gradually increase the time as your core gets stronger, aiming for 30 to 60 seconds per hold. It’s better to do shorter, well-executed planks than to hold a longer one with poor form.
Can planks help reduce belly fat?
Planks build muscle and endurance in your core, but they don’t specifically burn belly fat. Spot reduction isn’t a thing. To lose fat overall, you need a combination of a healthy diet and full-body exercise. Planks are great for strength and posture, but pair them with cardio and strength training for fat loss.
What is the best time of day to do planks?
There’s no single best time; it depends on when you feel most energetic and can focus on form. Some people like mornings to wake up, others prefer after work to de-stress. Just make sure you’re not rushed and you have a comfortable surface. Consistency matters more than the clock.
Are planks better than crunches for core strength?
Planks and crunches target different things. Crunches focus on the rectus abdominis (the ‘six-pack’ muscle) through movement, while planks build endurance and stability in all core muscles at once. For overall core strength and back health, planks are often more functional and safer for your spine. You can include both, but planks are a solid base.
Final Thoughts
My tip: start with the classic forearm plank and focus on your form, not the clock. Even a 20-second perfect plank beats a wobbly minute. Build up gradually, and you’ll likely notice better posture and balance within a few weeks.
Remember, consistency matters more than intensity. Listen to your body, and if something hurts, stop. For lasting results, mix in side planks and variations as you get stronger, and give your muscles time to recover.
This article is for general information only and is not medical or professional advice. Planks are generally safe for most people, but if you have a pre-existing injury or a medical condition, or if you feel pain during exercise, stop and consult a doctor, physical therapist, or other qualified professional before continuing.